Report Tables are a replacement for the OpenInsight EditTables. Report table has many more functions and options and are detailed below.
A report table can be identified by the heading "Drag a column heading here to group by that column". The report table is used for display only and no data (if changed) can be saved
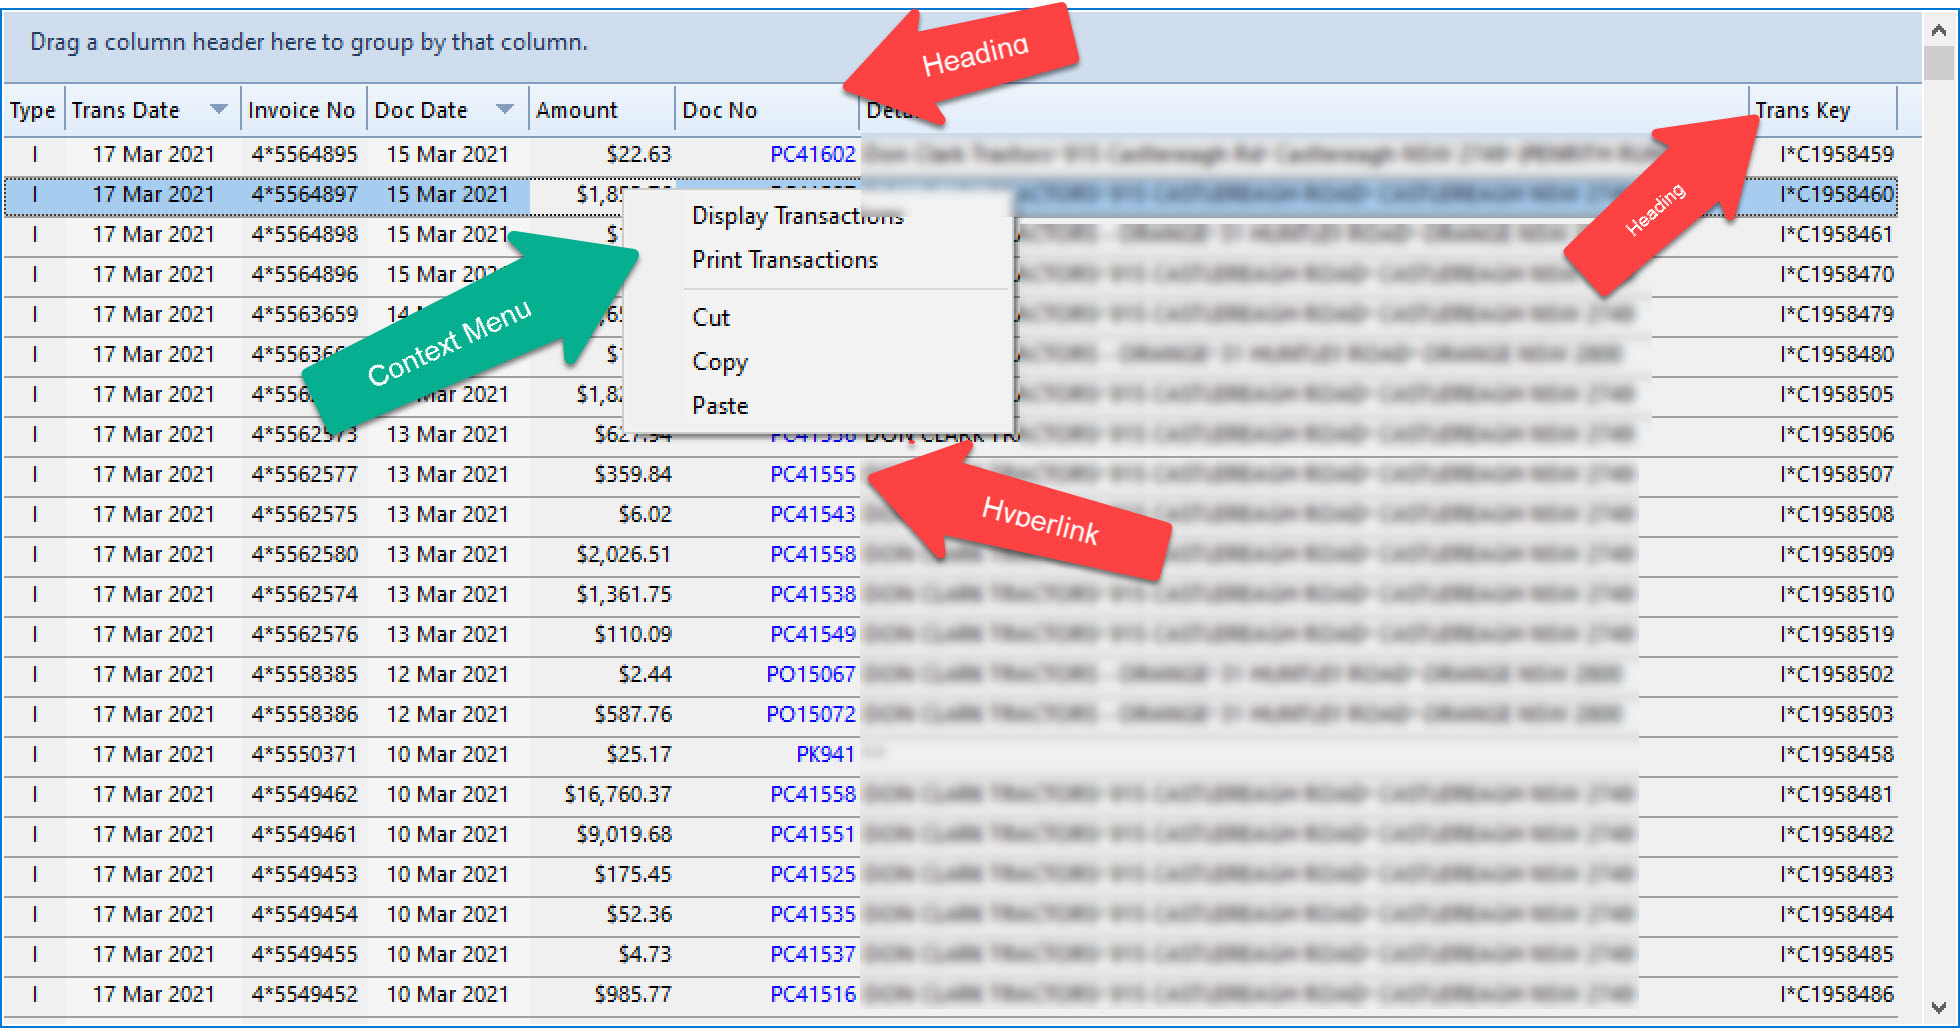
Right click anywhere inside the report table to display the context menu. Then click on the required option to invoke the context function.
Click on a heading to sort the content of the report table
For Multiple Sorting hold the shift key down and press the heading of the next column to be sorted. In the example above the "Trans Date" column was sorted first then sorted by "Doc Date".
Hyperlink is identified by the the blue font and when hovering over a hyperlink cell the text is underlined. Press the hyperlink to activate the hyperlink option. In the example above the hyperlink will direct the user to the Purchase Order details.
A column can be re sized by placing the cursor between 2 headings, while holding the left mouse button down drag the column heading to adjust the column width.
A column can be automatically adjusted by double clicking between 2 headings. This will adjust the column width to fit the column text.
Hold the left house button down on any heading and drag the heading to any other position.
To print any viewable report table, right click on the report table (context menu) and select the "Print Transaction" option. This will print all of the report table with NO grouping or print the expanded group only. This includes multiple expanded groups.
Grouping is when a heading is dragged into the area just above the all the headings. Multiple headings may be grouped by dragging another heading into the grouping region. Any group may be un grouped by bragging the heading back the the heading region. The example below grouped by "Type" then by "Trans Date"
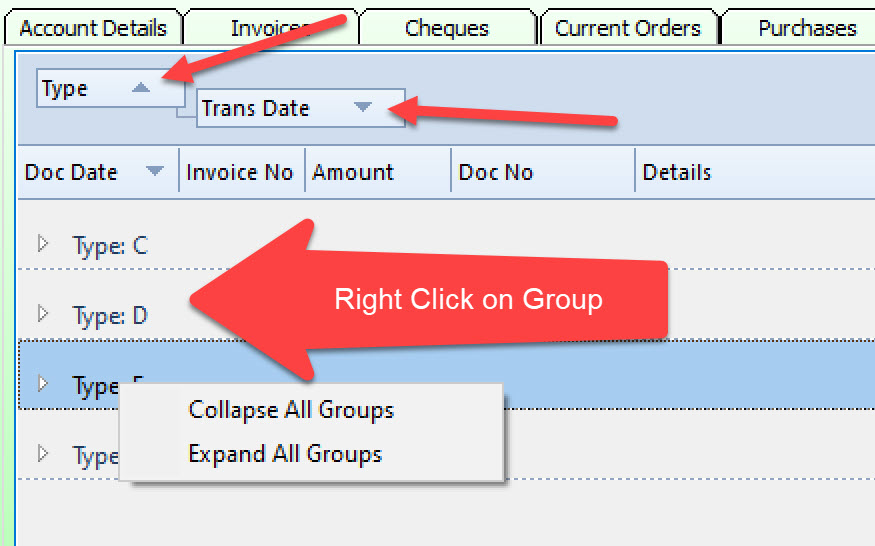
Right click on group heading to Collapse or Expand ALL Groups.
Click on any group to expand/collapse any individual group. If a group is expanded then this group will be included in the printout.
In the example below the type "I" was expanded:
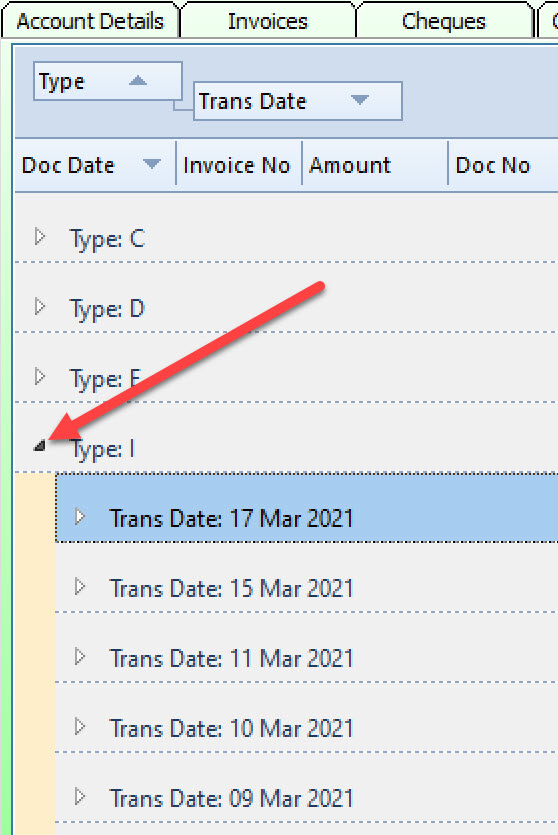
If the Trans date: 17 MAR 2021 is further expanded then the following with be displayed:
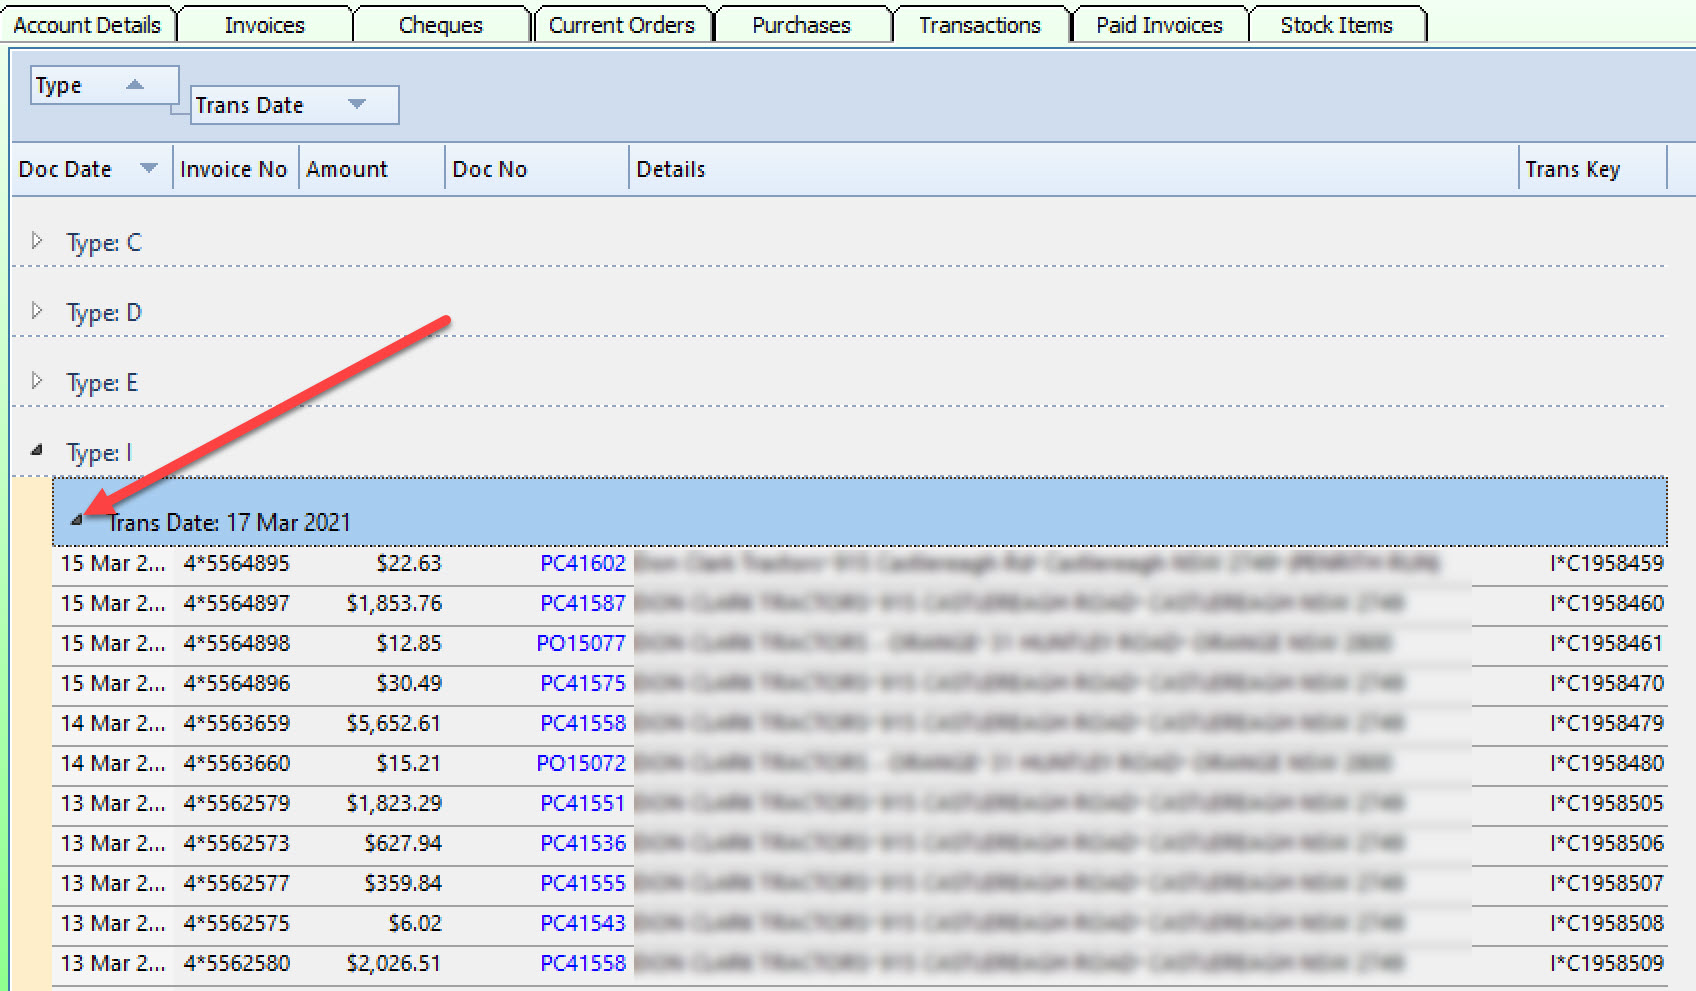
Now ALL the transactions for type "I" and "Trans Date: 17 MAR 2021" can be printed.