Use this wizard to create new customer and debtors. Remember that all debtors are customers but not all customers are debtors.
Customer details are maintained by the salesman while the debtor details are maintained by the accounts department. Also the customer file contains the physical address for the salesman but the debtors master file may contain a post office box where invoices are sent.
To avoid duplication of customers the user is advised of any similar customers.
Name:
After entering the company name the system will check for possible duplicates.
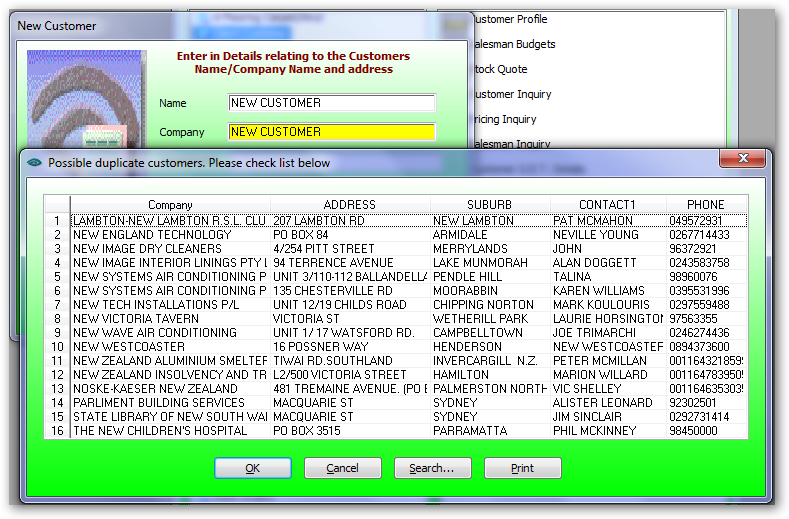
In this example all customers with NEW are displayed for checking duplicates.
Press cancel if this is a new customer.
Company:
This is defaulted to the name entered above.

Department:
Enter the customer department to add to the address. Usually left blank.
Street:
Enter the physical street address NOT the PO box.
Suburb:
In this example SYDNE was entered and a popup is displaying all 'SYDNEY' suburbs. If NO popup is displayed then this Suburb is not in the Post Code file and is essential this suburb be entered. If not then the transport module will not function correctly.
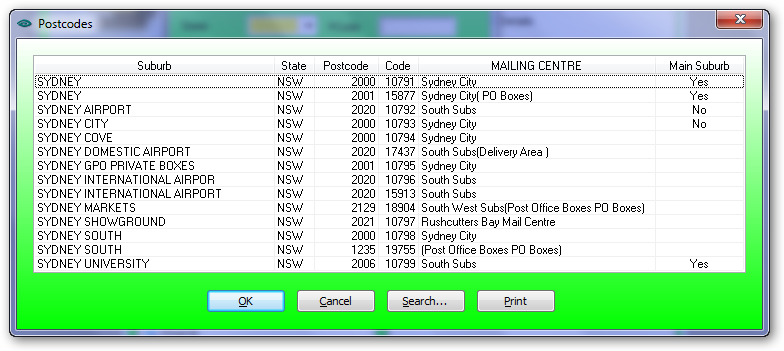
Select the suburb with the correct post code.
Then the State and Post Code will be automatically entered.
Press Next
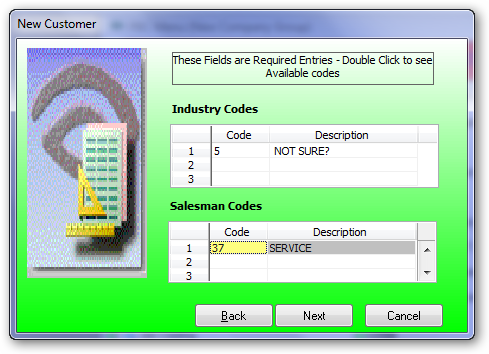
The above are required entries and cannot be skipped.
Press Next
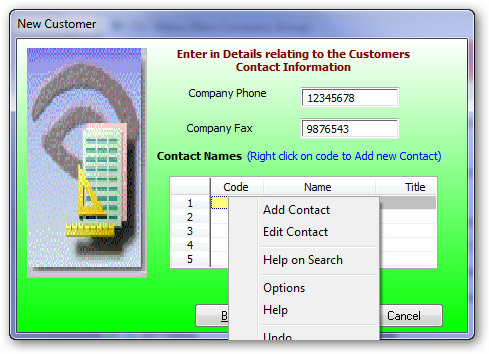
Company Phone:
Enter the company phone. It is suggested the area code is also included.
Company Fax:
Enter the company fax. It is suggested the area code is also included.
Contact Names:
Right click on Code to Add Contact. Fill in the contact details in the contacts file and the contact code will be filled in.
Repeat the process to add other contacts.
Press Next

Region:
Press drop down to select a region. Region is a required entry
Fax Out:
Tick this box if this customer is to be included in the fax out routine.
Follow Up Date:
The follow up date is saved in the customer file
Priority:
Priory is used in some client reports.
Create Debtor Record:
If the user is
Press Finish
.